Find the PDF on Ravelry here
Pin it here
Find the Emily pattern here

What you’ll need:
*Size H (5mm) hooks
*Bernat Velvet in Orchid Crush
*Tapestry needle for sewing in ends
Gauge: With an H hook 8sc x 7rows =2x2”
Abbreviations:
*ch- chain
*slst- slip stitch
*BB- back bump
*sc- single crochet
*scdec- single crochet decrease
*MC- magic circle
Ravelry store: www.ravelry.com/designers/brooke-rabideau
Instagram: https://www.instagram.com/snugglyfoxdesigns/ FB page: www.facebook.com/snugglyfoxdesigns Facebook Group:
https://www.facebook.com/groups/595025770843317/
Email: snugglyfoxdesigns@gmail.com
This pattern is the property of Brooke Rabideau at SnugglyFoxDesigns or brabideau on Ravelry. Feel free to sell any items made, but please do not share this pattern. :)
**This pattern is worked from the bottom up like a footed onesie.
Left Leg
Round 1: MC, ch1, place 9sc in the MC. (9)
Round 2: 2sc around. (18)
Round 3: (2sc, sc) around. (27)
Round 4-5: sc x 27 (27)
Round 6: sc x 9, scdec x 5, sc x 8. (22)
Round 7: sc x 9, scdec x 3, sc x 7. (19)
Round 8: sc x 9, scdec x 2, sc x 6. (17)
Round 9-19: sc x 17. Tie off leaving a long tail for sewing up crotch later. (17)
Right Leg
Round 1-19: Repeat rounds 1-19 of Left Leg, but don’t tie off. (17)
Round 20: sc x 8, start your 9th sc, but leave 2 loops on your hook.
Continue to crochet on to other leg

Round 20: with 2 loops still on your hook from the left leg, insert your hook into the next stitch on your right leg, (the stitch after the one you tied off) (see pic)
yarn over and pull through, yarn


Round 21-30: sc x 32. (32)
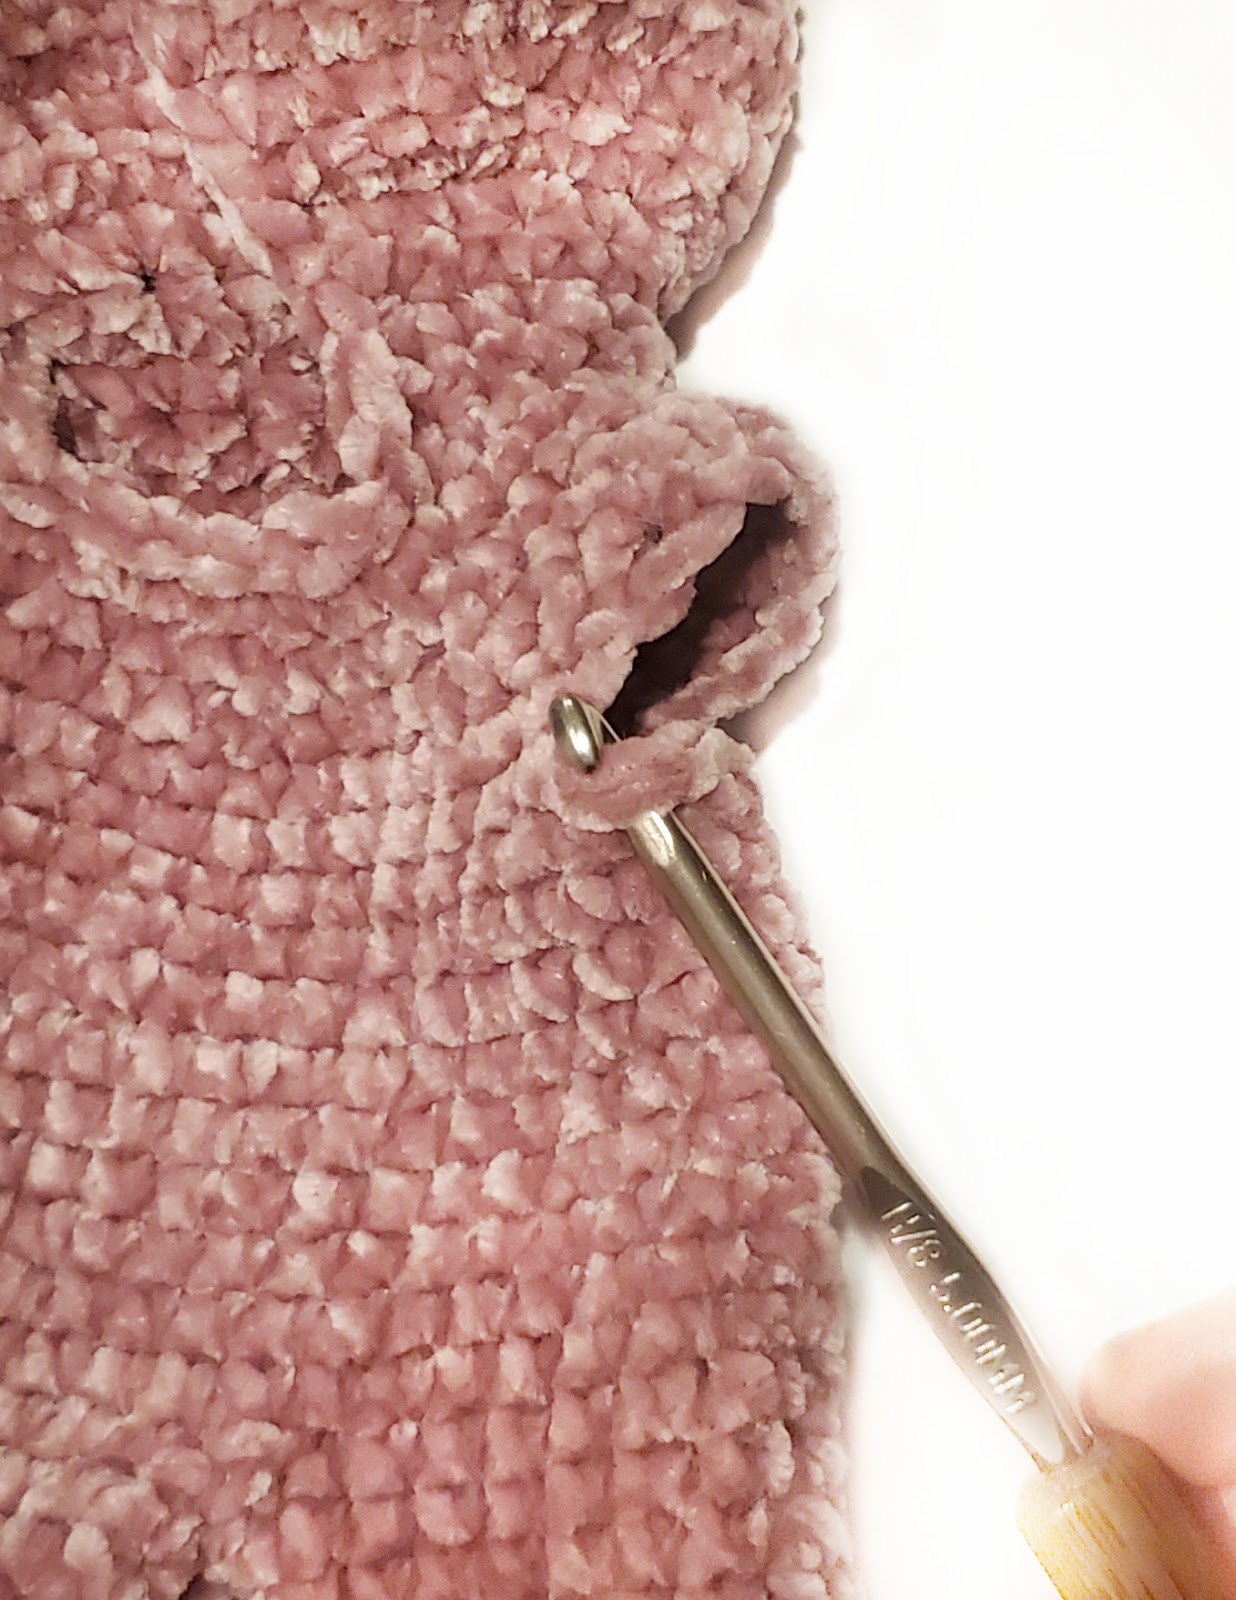
Round 31: Ch10, skip 4 stitches, sc x 12, ch10, skip 4 stitches, sc x 12. (12 sc on front, 12 sc on back, 2 ch10 spots, 2 skip 4 stitches spots) (see pic)
Round 32: sc x 44. (44 including chains)
Round 33: (sc x 3, scdec) around ending with sc x 4. (36)
Round 34: (sc x 2, scdec) around. (27)
Round 35: sc x 27. (27)
From now on you’ll be working in rows to create the hood.
Hood-
Row 1: continue on from Round 35. Sc x 20. (20)
Row 2-4: ch1 and turn, sc x 20. (20)
Row 5: ch1 and turn, (sc, 2sc) across. (30)
Row 6: ch1 and turn, (sc x 2, 2sc) across. (40)
Row 7: ch1 and turn, (sc x 3, 2sc) across. (50)
Row 8-15: ch1 and turn, sc x 50. (50)
Row 16: ch1 and turn, (sc x 3, scdec) across. (40)
Row 17-21: ch1 and turn, sc x 40. (40)
Row 22: ch 1 and turn, (sc x 2, scdec) across.

Row 23-31: ch1 and turn, sc x 30. (30)
*Continue to sc down right side of hood, around the face opening, and up the left side. (See pic) Tie off and leave a tail for sewing.

*Sew the top of your hood together and weave in ends. (see pic)
Arms (make 2)-

Round 1: Attach yarn at the armhole, sc x 14. (14)
Round 2-12: sc x 14. Tie off and weave in ends. (14) Repeat for other side. (See pic)
Ears (make 2)-
Leave a long starting tail to sew ears on to Round 26 of hood.
Row 1: ch11, sc in the BB of 2nd ch from hook and each ch across. (10)
Row 2-24: ch1 and turn,sc x 10. (10)
Row 25: ch1 and turn, scdec, sc x 6, scdec. (8)
Row 26: ch1 and turn, scdec, sc x 4, scdec. (6)
Row 27: ch1 and turn, scdec, sc x 2, scdec. (4)
Row 28: ch1 and turn, scdec x 2. (2) Tie off weave in ends.
Tail-
Make a small pom and sew it on to back of onesie.
x
No comments:
Post a Comment